Is your leopard gecko deserving of a photo shoot? Here are some simple tips for leopard gecko photography. These tips can work for general pet photography as well as geckos.
I’ll outline techniques we used for the photos and images used on this site and also share the gear I used.
Camera Gear
I didn’t have a fancy camera when I first got Dude. I was just getting into photography and moving up from a basic point-and-shoot camera. At that time, cell phone cameras weren’t good enough for more than a quick snapshot.
Starting Out
After researching some options, I decided on the Nikon Coolpix P series, and went through several models over time (P80, P100, P500.) Most of the shots of my gecko when he was a hatchling to several years old were done on one of these models. These particular models aren’t readily available anymore, though you may find them used. The closest model available today would be something like the Nikon Coolpix P1000, and is much improved over the models I shot with. It has an insane 3000mm zoom.

The Nikon P series are ‘superzoom’ cameras, meaning that the magnification level is high. You can zoom in ridiculously close to your subject without moving. These cameras served as good starting points when I was getting into photography. So, if these cameras are so great, why did I switch to something else? The short story is I outgrew this type of camera and wanted more control and flexibility.
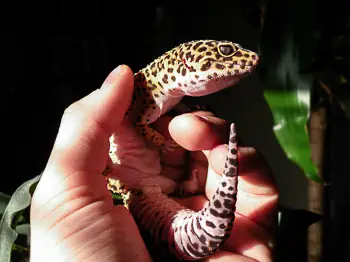
Here are a few shots taken with the Nikons:


With a superzoom camera, the slightest bit of camera shake can make your shots blurry (though a good tripod can help.) The noise level is also high in low light situations, making the image look grainy. Cameras in this class shoot JPG format which limits some options in editing, and generally do not have the ability to use RAW format. That said, I’m proud of some of the shots accomplished with this series of camera (like the photo at the top of this post.) I’ve since upgraded, and hopped on the mirrorless bandwagon.
Updated Camera Rig

I was traveling frequently for work at the time, and wanted a camera rig that was compact and versatile. I started shooting with a Sony NEX-6, which I practically wore out. I stuck with the Sony E-Mount camera line. Today I’m a fan of the Sony A6000. It’s compact, lightweight, and you can choose from a variety of lenses. The relative size is roughly comparable to the superzooms when using a prime lens, with much improved quality and control.
Here are a few shots taken with the Sony A6000


The A6000 is now an ‘older’ model, though it’s still readily available, and has seen price drops as each shiny new model gets released. Other models in these series (A6300, A6400, A6500) would also make good choices and all use the same E-mount lenses.
Lenses
Speaking of lenses, your choice of lens for mirrorless or DSLR cameras can have a huge impact on the quality of your photos. Most cameras come with a ‘kit’ lens so you can get started quickly.
Kit Lens – Sony 16-50mm f/3.5-5.6
This is the lens that comes with the Sony E-Mount series cameras. It is compact and versatile. I still use it when I want to shove the camera in my jacket or cargo pocket and go. It’s great to experiment with before moving into some of the pricier options. Sure, the kit lens is not the best quality option, but still capable of producing some great shots. Its low profile makes it a great choice for something small and easy to carry.
SEL18200
This is a great everyday lens, going from wide at 18mm to a respectable zoom. It’s larger than a prime lens, but has a much further reach with the 200mm telephoto. This makes a great all around lens and offers versatility. That said, it may not be the best choice if your aim is leopard gecko photography. For shooting my gecko (or other pets), I usually find myself using a prime lens.
SEL24F18Z
This lens is awesome. It’s a prime lens, so there is no zoom. If your main use case is shooting a pet in a controlled environment, it’s easy to set yourself up at the right distance. The fast 1.8 aperture gives great low-light performance. It also allows a wide depth of field, allowing parts of your image to be tack sharp, while other parts have a soft bokeh effect.

Zeiss lenses are not cheap, but you’re paying for quality. You can often find these lenses used for much cheaper than list price. Browsing the used listings on Amazon, there are usually numerous options for sale almost half off of list price. (Pro tip – I bought mine used!)
Bottom line – this is the lens that spends most of the time on my camera.
SEL55F18Z
This is the 55mm version and is also a Zeiss prime lens. The 55mm makes a great portrait lens on the Sony A6000 and similar models. It lets me shoot while being just a bit further away and allows great control over the aperture and depth of field.
I also like using this lens with Macro Tubes for close up photography, which we’ll talk about later.
Again, do yourself a favor and browse for a used one.
SELP18105G
This lens is a newer acquisition and I haven’t shot with it as much. I got this lens as a replacement when my 18-200 zoom lens broke. It makes a good lens for video with a fixed aperture and powered zoom.
Macro Extension Tubes

I briefly tried a dedicated macro lens, but wasn’t excited with the results. Macro extension tubes fit between the camera body and the lens, and lengthen the ‘barrel’ of the lens. You need to get close to lock focus, but you get much more of your subject in frame.
I like using these with the 55mm Prime lens (SEL55F18Z) for some great close up photography. At under $20, these are a cost effective solution to turn nearly any lens into a macro lens.
You’ll need to get in close to your subject when using macro tubes, sometimes with the lens only inches away. I used these macro extension tubes to shoot close up of gecko skin and feet for these articles:
All In One Camera
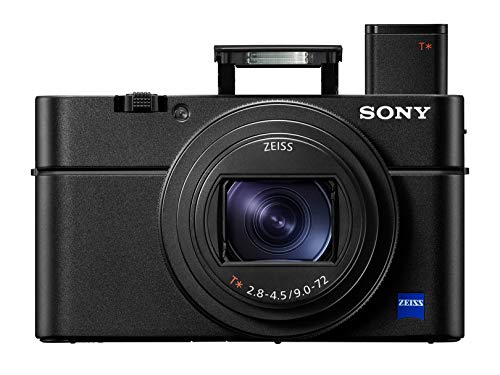
If you want something that can take quality shots but don’t want the hassle of managing multiple lenses, the Sony RX100 series may make a good compromise. Each new release of this camera series gets better, and with a Zeiss lens the image quality is excellent. Prices change from time to time, and you can check Amazon for the best price.
I may have opted for these instead of the Nikon P series if the RX100 cameras were available when I first started getting into photography.
Lighting
Lighting is a key component in photography and can make or break a shot. I like using natural light as much as possible. For some of the shots you’ll see on this website, I just put the gecko on the dining room table with natural light coming in through the windows.
At the right time of day when the light is coming in at just the right angle, this is spectacular. Sadly, this perfect lighting situation is fleeting. Since you can’t shoot everything with perfect natural light, additional lighting or a flash is sometimes needed.
Camera Flash
Built in flash can be harsh, but there is a simple solution. You could purchase a flash diffuser – there are numerous on the market – or you can do what I did. I used a tissue.
Here’s the scene: I happened to catch our leopard gecko, Dude, right as he was just starting to shed. I arranged a few objects from his enclosure on a table, and let rub up against them and pull off the old skin while trying to get some good “shedding” photos. He was moving too quickly and all the shots were coming out blurry. I needed more light.
A flash seemed just the thing, but was too harsh and left everything overexposed. Everything I was shooting was blurred or washed out, so I needed to soften the flash. I tried the trick of pointing the built in flash toward the ceiling for more of a bounce flash, though this provided uneven (and harsh) lighting. Of course Dude didn’t care, and continued to slough off his old skin. A flash diffuser would be the answer, but I didn’t have one. What to do? Improvise!
The Tissue Hack
A simple tissue folded over a few times and held in place with a rubber band did the trick. It illuminated the shot nicely, and provided a softer, even light. Not terribly elegant to have a tissue wrapped around your camera, but people looking at the photograph will never know the soft lighting was the achieved by such a low tech solution (unless you’re writing a behind the scenes blog post.)
Ring Lights and Flash
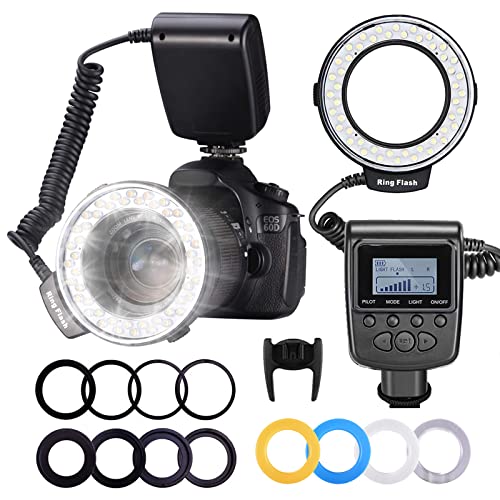
Ring flashes are circular shaped flashed that fit around the camera lens. They provide even lighting and few shadows since the light source is close to the lens. Ring flashes are great, though also expensive. I’ve found a ring light can do much the same thing at a fraction of the cost, while still keeping your shooting rig compact. This is an updated model of the one I use with the Sony Alpha cameras. I was surprised how cheap these can be found on Amazon. I like that it has several options for power, and that you can illuminate the whole ring, or one side or the other for some contrast.
Ring lights are great for portraits, either for people or your pet.
Light Boxes
I’ve also started using a simple light box. Light boxes are commonly used for product photography where you see an item nicely lit against a plain background. They also work great for shooting your gecko (if you can get it to hold still long enough.)
DIY Lightbox?
You could go the DIY route, though there are a number of cost effective light boxes readily available and easy to use. I looked at some DIY designs, and for the time it would take to make one, set it up and break down between shoots, it made more sense to just buy one.
Buying a Lightbox
So, I’ll admit, I tried to save a few bucks and go cheap right out of the gate. You can find lightboxes under $20 or so, and I can tell you I wasn’t happy with the size, build quality, or lighting. These may be sufficient for small product photography, but were not big enough to work for an adult leopard gecko.

Moving up to the next size was an easy choice. For around $50-60, you can get a light box with a simple and quick setup and bright, even lighting. This is the one I use, readily available on Amazon. It folds flat and has Velcro on the sides of the box for quick & easy set up and tear down. You can shoot from the front of the box or through a flap in the top, depending on the angle you need. LED Lighting is built in, bright, and can be controlled with a dimmer switch. It also comes with an assortment of colored backdrops. This gives me a mini photo studio anywhere I can fit a 20 inch cube.
The light box was used for many of the close up shots you’ll see throughout the website. The shots of mealworms, beetles, and insects were all done in the light box.
Camera Settings for Pet Photography
What are the best settings for leopard gecko photography, or pet photography in general? Like any kind of photography, you want to match your settings to best capture what you’re shooting.
Shutter Control and Fast Action
A higher (faster) shutter speed will help you freeze the action if your pet is feeling feisty and moving quickly. It also helps to shoot in burst mode. Burst mode will shoot multiple shots while you hold down the shutter button, giving you a number of individual photos to choose from. You’ve got a better chance of catching a ‘magic’ moment with this technique than trying to time pressing the shutter at the exact moment when your pet does something cool.
Aperture Control and Depth of Field
If your pet is lounging, sleeping, or occasionally changing position, you could use Aperture control. The aperture setting controls how much light reaches the lens, and helps define what parts of your photo have the sharpest focus. With a low aperture, you can make sure the focus of your photo is tack sharp while the background has a soft blur effect.
For a quick example, check out the leopard gecko on our home page. Notice how the eyes and head are clear, though as you look down the body and along the tail, the focus is much softer. This represents a shallow depth of field, and draws focus on the gecko’s head.
Prime lenses like the Sony SEL2418z have a low aperture (this particular model goes down to 1.8) which is why it’s one of my favorites.
Most cameras have aperture control, and some smart phone camera apps allow access to these kinds of settings if you dig deep enough in the menus.
The Best Camera
There is an old photography adage that the best camera is the one you have with you (or simply the one you have). Now almost everyone has a decent camera to start with as smart phone companies put more effort and development into phone cameras and sensors.
I still prefer the control a dedicated camera offers both during shooting and editing, especially when shooting leopard gecko photography in a “controlled” environment at home. I highly recommend the gear highlighted here, and cannot give a better endorsement than, “This is what I use.” In the end, it’s less about the tools you use, but more about what you do with them.
Whatever camera you have, get started!
Disclosure: This page contains Amazon affiliate links, which means that we may receive a commission if you make a purchase through one of the links on this site. This is at no additional cost to you and helps us continue to offer free content and information.
He also enjoys photography; and what’s better than combining two things you enjoy?